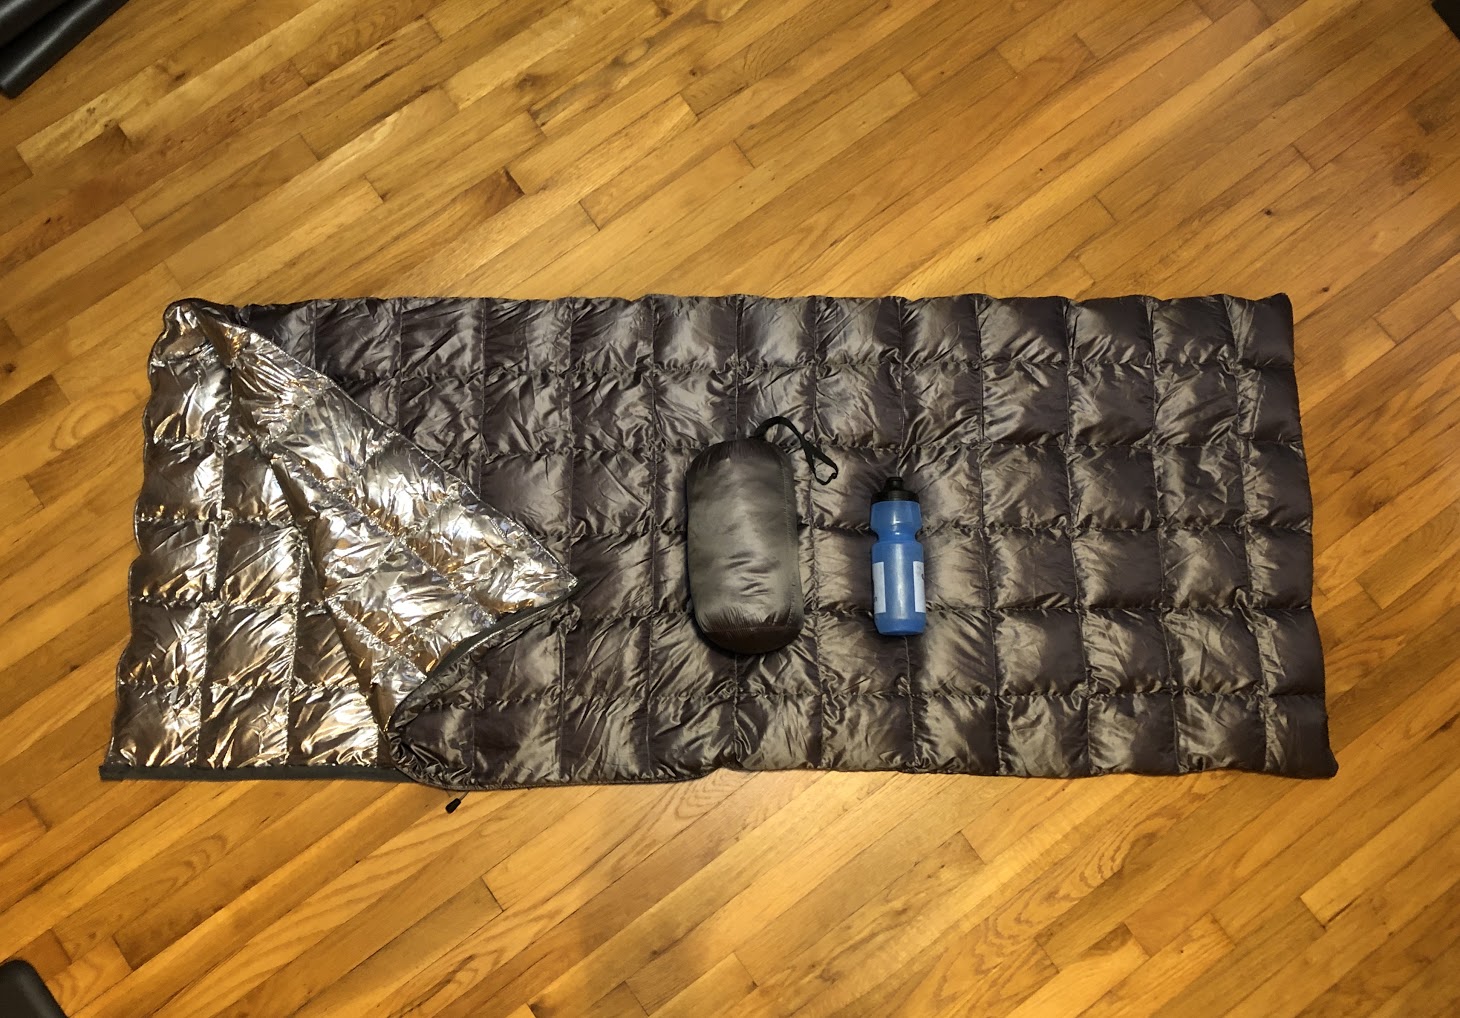
The Costco’s Double Black Diamond down blankets have been around for a number of years and have been quite popular among DIY’ers and MYOG’ers. I finally got my hands on a similar blanket that was being sold in a Dillard’s near where I live. I ended up buying two of them for $15 a piece, originally they were $30. Dillard’s had two versions, one with a silver reflective side and another without, but with slightly more down. I chose the reflective coating because it seemed very similar to Omni-Heat by Columbia and would make a cool looking sleeping bag.
650 Fill Power Premium Down and 60″ X 70″
Although, I have read other posts about the blankets on reddit and watched YouTube videos, I wasn’t quite sure what I wanted to do with them at the time. Most individuals who buy these down blankets buy them to create a down quilt for their hammock setup, which is a great idea, and one that I might do with the 2nd blanket that I have. Below is what I’m talking about.
However, with the one, I decided to create a super simple down sleeping bag. I thought about using two to create a longer bag for my 6’4” frame, but decided to keep it simple with the typical rectangle design to create a 50-60 degree bag. But, since the length is only 70 inches (5′ 10″), I would hang out about 6 inches. Leaving my upper chest and head out to the cold air. So after seeing Rapha’s new Explore Down Sleeping Bag a few days ago, I knew I could get away with it being a little shorter by using my Eddie Bauer Downlight Stormdown jacket to cover my upper body and head.

Rapha’s Explore Down Sleeping Bag
Rapha sells this really outside of the box 3/4 sleeping bag for $330, which they promote with the $295 Explore down jacket, but would work with any puffy jacket (most people already own one already). So the complete setup will set you back $625, which is pretty steep, but is comparable in price to their other apparel that they sell. I do think the design is quite innovative for ultralight hikers and bikepackers. The design cuts down on a lot of weight, incorporates your other gear and allows you to sleep with your shoes on. 🙂
The upper half of the bag provides a bivy like torso section to protect your jacket when sleeping on gravel like the guy pictured above. Maybe he was hurt and could only slide into his bag and put on his jacket, or they didn’t want to promote a product that’s not their’s. Next thing we will see is a sleeping pad for another $200.
Anyways, their design gave me the go ahead to stay with the simple shorter sleeping bag, using just the one down blanket.
Rapha’s Explore Bag Details:
- Comfortable down to 15°C or 60°F
- 850 Fill Power Down with DWR Coating
- Responsibly sourced down
- Drawcord at the waist and head to lock in heat
How I Made My Down Sleeping Bag
Like I said above, I decided to just fold over the blanket in half to create the typical rectangle (envelope) sleeping bag you normally find at Walmart, but with down insulation, not the cheap polyester insulation. The blanket is 60 inches wide and 70 inches long (or vice versa), so when the blanket is folded over it provides 30 inches of room (crazy how that works out), which is plenty to allow your arms at your side and for your feet to move. You could easily sew it into a mummy style, but the extra room is always nice to have if you move around a lot when you sleep.
Supplies used in the making:


Steps:
Step 1: Settle on the shape of the bag (mummy, envelope, or custom). I chose the simple envelope style which did not involve any special cuts.
Step 2: Decide on how you would like to keep the bag closed, fully sewed shut, zipper or velcro. I chose a long zipper to use for the upper half of the bag. Pro tip: salvage zippers from old backpacks or other bags that you might donate or give away. The zipper I used was from an old High Sierra work backpack. I basically cut all the zippers off and use a seam ripper to clean them up.
Step 3: Fold the blanket in half with the future inside facing out and match the ends together. This will create a clean seam when sewed together. Below is how it will look when turned right side out after your finished.
Step 4: Line up the foot end and begin to sew across the bottom, stopping at the corner or you can continue on. I stopped at the corner to lock in the bottom. Pro tip: you can go back and sew another line to double the strength of your first seam. You can also play with the different style of stitches, some styles provide more strength than just the single line stitch.
Step 5: Sew up the side of the bag and make sure to stop where you want the zipper to start. I stopped around 36 inches up the side of the bag. I cut down the zipper pictured below to about 34 inches. This allowed enough room to bend my knee up and out of the bag.
Step 6: At this point you can turn the bag right side out to sew on the zipper. I used a straight pin to lock the zipper onto the bag where I stopped sewing, so I could sew it cleanly onto the edge of the blanket.
Step 7: Using a a zipper foot start to sew both the zipper and the edge of the blanket as close as you can to to the edge of the zipper teeth. Repeat the same step for the other side of the zipper.

Step 8: This step can be optional depending on if you purchased a zipper of the correct length or you cut down a zipper removing the zipper ends. Since I cut down the zipper, the zipper did not have the normal stopper to keep the zipper slider from being pulled off. So I sewed on some soft fleece to both sides of the zipper end to prevent the zipper from coming off. Not the best looking but it is functional.

Step 9: Clean up any loose ends and enjoy your new bag.

Other Alternatives
Checkout the links below if you want to make your own or buy a lightweight down sleeping bag. I won’t judge you if you end up buying one. 😉
Down Blankets:
Amazon:
- $160 – Rumpl The Down Blanket
- $70 – Down Blanket for Camping by ZEFABAK
- $63 – Horizon Hound Down Camping Blanket
- $43 – Puredown Packable Down Throw Sport Blanket
- $43 – Black Diamond Double Packable Down Throw
AliEpress:
Lightweight Sleeping Bags:

- $145 – Paria Outdoor Products Thermodown 30 Degree Down
- $143 – Mountain Hardwear Unisex Down Flip 35/50
- 125 – Outdoor Vitals LoftTek 30 Degree Ultralight Backpacking
- $110 – Hyke & Byke Ultralight Down Sleeping Bag: 3 Season
- $92 – AEGISMAX Outdoor Ultra Light Goose Down

AliExpress:
- $157 – Naturehike CW300 Ultralight Outdoor White Goose
- $112 – NatureHike Ultralight Envelope
- $79 – Aegismax Lengthened Ultralight Envelope
- $70 – Aegismax Ultralight Lengthened Mummy
- $64 – Aegismax Ultra Light 90% White Duck down sleeping
- $63 – WINGACE ultralight duck down
- $60 – Ultralight Envelope Sleeping Bag Outdoor
Have any questions about my setup?
-thebidon
Disclaimer: As mentioned on my other posts and like most sites, if not all websites, the links above are affiliate links that help to keep this site running. Feel free to follow them if you like or you may search for them yourselves on both marketplaces.